Hi All,
Since getting this software I have been having entirely too much fun. I scored some clear inkjet decal paper and gave that a try to run off some of the graffiti decals. I figured out in short order that I really should have used the white inkjet decal paper to do the deed. None the less, it did give me a chance to play with that function, one of the primary reasons for my original purchase of this software.
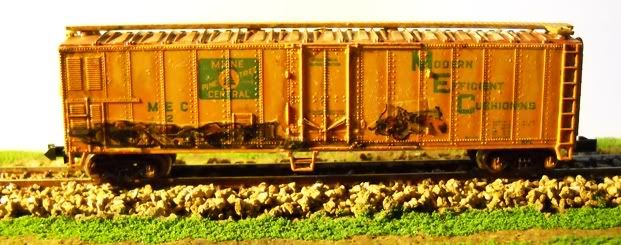
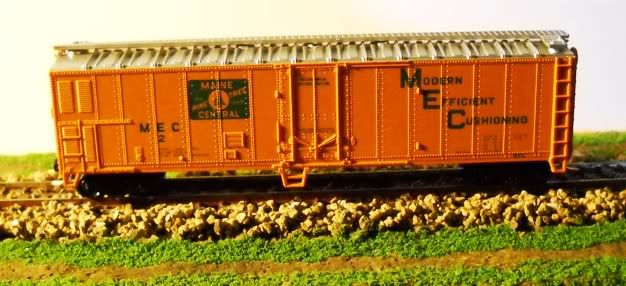
I started out with a nice ordinary little N Scale Maine Central MEC Reefer that was bright orange with green lettering and a silver roof. I like to weather my rolling stock so that it looks more like the real ones do that you see in the real world.
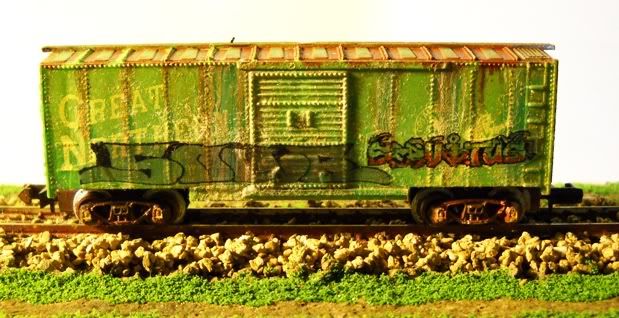
A combination of air brush applied extremely thinned white and yellow enamels faded the original colors and then I used some Rust colored enamel on the roof and drew it down the sides. This was followed by some Raw Umber oil paint to bring out the details in the crevices and corners of things. Once all this was dry, I shot on a coat of Gloss Clear from a rattle can. This makes a nice smooth surface for the decals to go on. I clipped out a few choice decals from my printed sheet, trimmed them and then put them in place. That was when I figured out that I should have used the white decal inkjet paper. The clear stuff would be good if you wanted to apply them to a completely white background like a coffee mug or something, but in this case the background colors muted the decal colors and everything underneath the decal showed through. Oh well, you live and learn. I used some Walthers Solvaset Decal Setting Solution to make the decals conform to all the rivets, ribs and hardware on the sides of the car, it works great by the way as you can tell by these pictures.
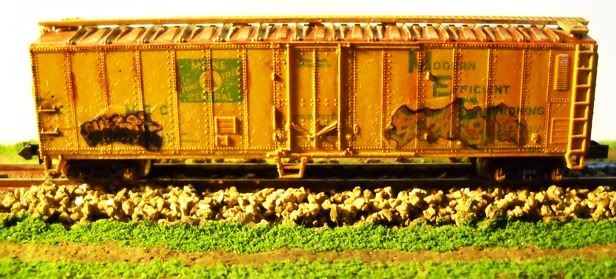
I have yet to shoot on the top sealing coat of clear flat finish and will wait until I get some white inkjet decal paper to reprint the decals and then reapply them. Once that is done and they show up like they should I will be a happy camper.
Jay
treadhead1952
Las Vegas, NV
My first graffiti experiment run amok!
-
- Posts: 15
- Joined: Thu Sep 24, 2009 4:14 pm
- Anti-spam Test 1: No
- Anti-spam Test 2: 5
-
- Site Admin
- Posts: 372
- Joined: Tue Sep 02, 2008 3:40 pm
- Anti-spam Test 1: No
- Anti-spam Test 2: 5
- Location: Denver, CO
- Contact:
The car still looks good!! Maybe the spraycan artist was low on colors that night, all that spraying has to cost them a lot.
White decal has it's advantages, the white base helps it cover colors better. I did read somewhere that if you are using clear decals you can paint your model white under where you plan to put the decal. Trace the cut out decal pattern before applying the paint. Don't test the white paint on your good model. Test on the underside or on some scrap material in case it is not the effect you planed. Have not tried it, just read about it. We do have white decal paper, we tested several before deciding to carry this one.
Evan Designs
-
- Posts: 15
- Joined: Thu Sep 24, 2009 4:14 pm
- Anti-spam Test 1: No
- Anti-spam Test 2: 5
Hi Evan,
Thanks for the kind words.
I have used white paint under decals in the past, mostly on really thin ones that have a known history of covering color issues. Also some of the expensive models that have darker colors overall have issues using just about any sort of decal without a white paint job first. Come payday I will be ordering up a pack of White Decal Inkjet Paper from my supplier and reprinting these decals to reapply them with better results. One of the reasons I have yet to add the final sealing coat of clear flat finish.
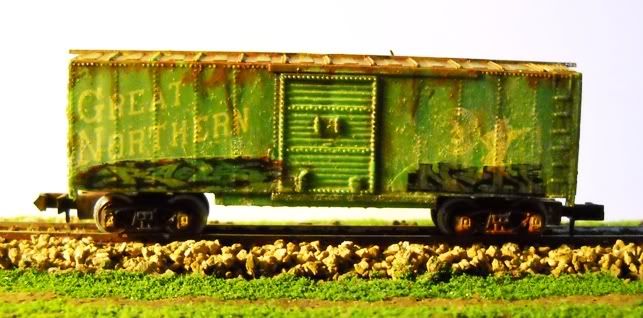
I learned to do a few weathering tricks in the course of my styrene modeling over the years and it has stood me in good stead now that I am into RR'ing. I also did this older Arnold Reefer Boxcar using the clear backed decals, some of the guys on the RR sites I go to actually liked the effects, but I am going for something that looks more like what I see roaming about the rails here in Las Vegas.
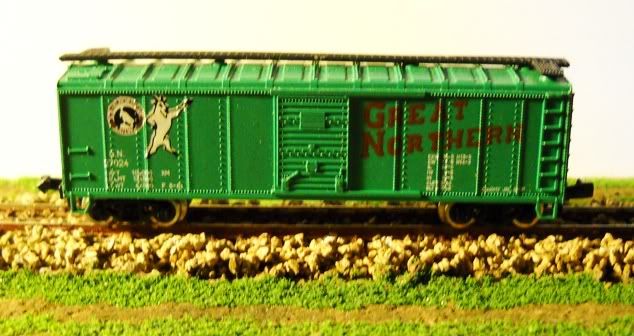
First, the original colors of the boxcar in question. This is actually a more modern version of the same car and shares its' original color Green even though the decals that this manufacturer used are in different positions on the car and in a different color for the "Great Northern" Script. Even they had issues getting those bright red decals to look right on this green color!
This is what I wound up with.
As you can see by the doors and hardware on them, Walthers' Solvaset Decal Setting Solution works wonders on getting decals to behave and suck right down to the plastic. Once they are overcoated with a final sealing coat, it makes the decal look like it is painted right on the surface instead of plastered on as an afterthought.